
This instructional tutorial will show you How to Install Add That Source Kodi Addon.
Add That Source is a new add-on located within the DaButcher Repository that can quickly install the most popular Kodi add-ons in seconds.
You can think of this as a “rapid installer” for the best Kodi repositories/addons available.
Note: Since Add That Source is not a video addon, both Real-Debrid and Trakt integrations are not available.
This addon is working extremely well on the most popular Streaming Devices.
This includes the Amazon Firestick, Fire TV, Fire TV Cube, NVIDIA Shield, MECOOL Box, Chromecast, Tivo Stream 4K, and more.
If you don’t have Kodi installed on your device, we suggest viewing our popular Kodi tutorials below.
How to Install Kodi on Firestick/Fire TV
How to Install Kodi on Android TV Box
Add That Source Kodi Addon Installation Guide
- Launch Kodi
- Click the settings icon


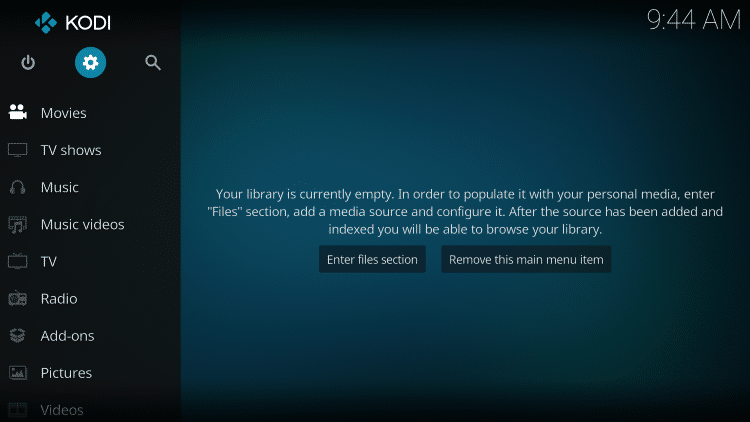
- Click System
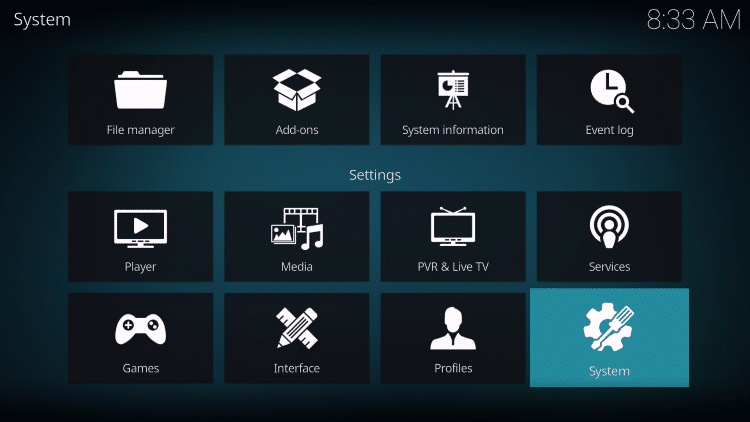
- Hover over Add-ons menu item and turn on Unknown sources if not already on
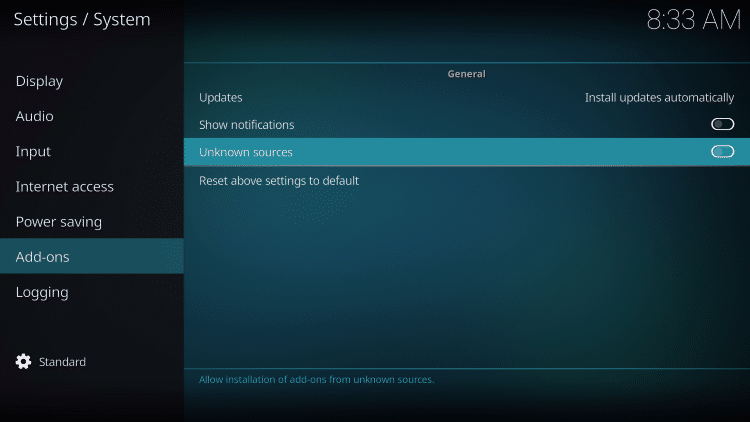
- Click Yes
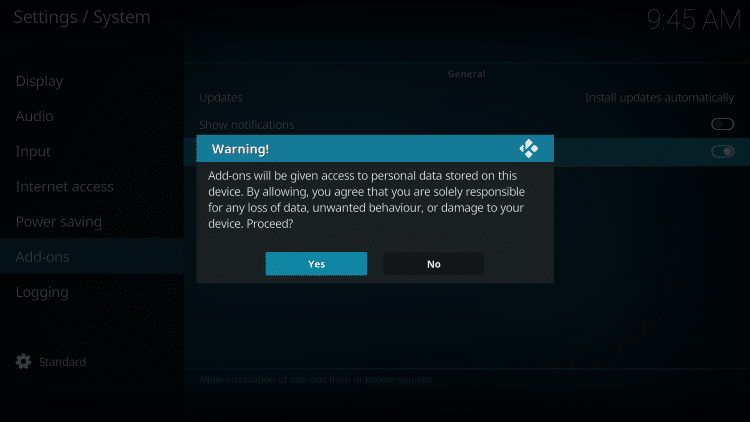
- Click back on remote to go back to the System page
- Select File Manager
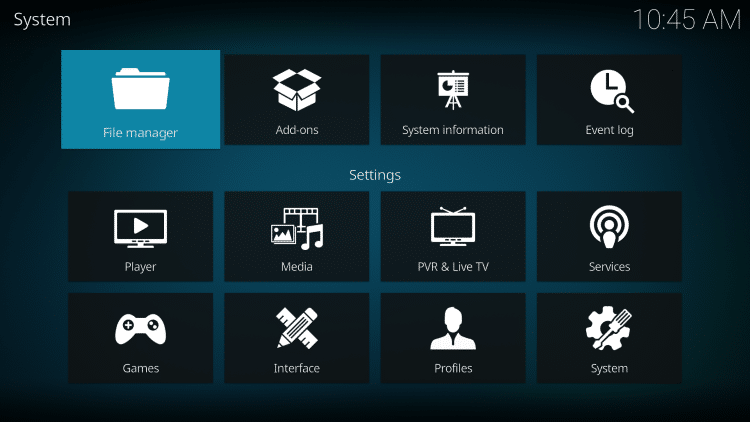
- Click Add source
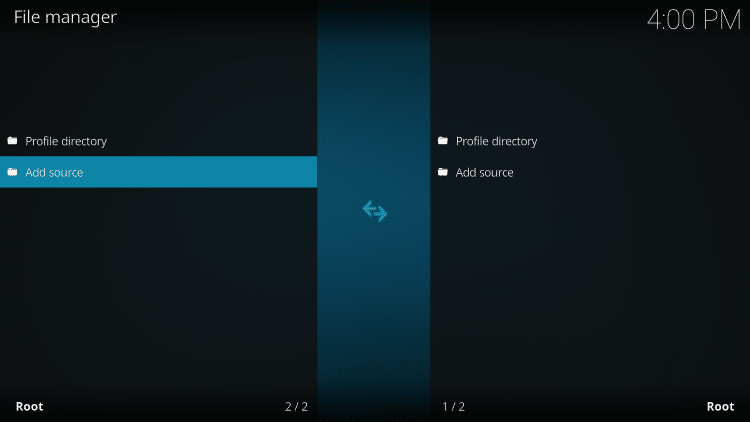
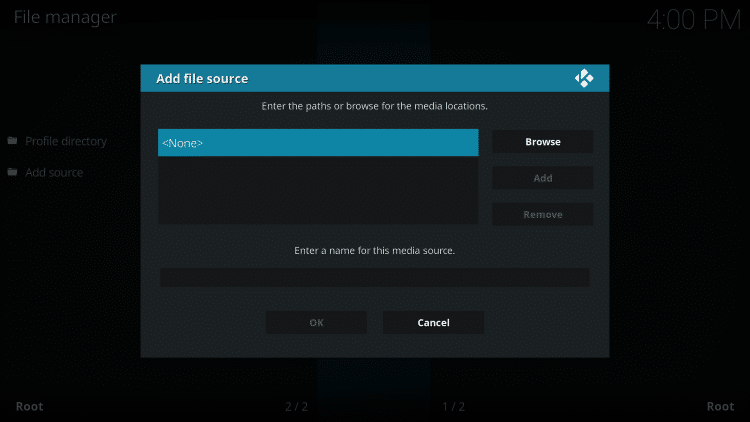
- Click <None>

Sick of Slow, Rural Internet?
Whether you live out in the country or take your RV off the grid, Starlink delivers blazing-fast internet to areas that traditional providers ignore.
Check Availability & Pricing- Type the following URL exactly how it is listed here – http://dabutcher.org/repo and click OK

- Highlight the box under the source that you just typed in and enter a name for this media source, type “dabutcher” or any other name you would like to identify this source as and click OK again

Exclusive Surfshark Discount
Warning: Your online activity is currently monitored by your ISP, app/addon/IPTV developers, government agencies, and the websites you visit.
- Become 100% anonymous while streaming and downloading.
- Use on Unlimited Devices & share 1 account with the entire family.
- Save 85% with the 24-Month Plan + Get 3 FREE Months.
- Click your back button on the remote or keyboard until you are back on the System screen
- Choose Add-ons

- Click Install from zip file

- When prompted with the following message, click Yes

- Choose dabutcher or another name you assigned the media source in the previous step

- Click the zip file URL – repository.dab-1.3.zip

- Wait for the “DaButcher Repository Add-on installed” message to appear

- Click Install from repository

- Choose DaButcher Repository

- Click Program Add-Ons

- Select Add That Source

- Click Install

- Wait for Add That Source Add-on installed message to appear

Big Tech is Scanning Your Emails
Stop letting free providers read your private messages to build advertising profiles on you. Take back your digital privacy with a secure, ad-free inbox.
- Return back to the home screen of Kodi and choose Add That Source within the Add-ons category

- That’s it! You have installed the Add That Source Kodi Addon on your device.

See below for setting up Add That Source.
How to Setup Add That Source
After installing Add That Source Kodi Addon, you then have the option to install various repositories.
Follow the short guide below for setting up this add-on.
1. Choose any repository you prefer and click it.

2. Make sure the repository URL is highlighted and click OK.

3. Enter any source name and click OK.

4. Click OK when this message appears.

5. Return to the home screen of your device. Then locate Kodi within your apps and select Force Stop.

6. Launch Kodi 19 Matrix.

7. Navigate to the Add-on browser click Install from zip file.

8. Click Yes.

9. That’s it! You will notice the various repositories that you selected from the previous steps. Just simply install whichever repositories you prefer.

Description & Details
Add That Source contains a simple interface with several Kodi repositories to choose from.
As mentioned previously, some of the more popular repositories available within this addon include Venom, Narcacist, Slamious, Magnetic, DejaVu, DaButcher, Octopus, and others.
Give Add That Source Kodi Addon a try today!
FAQs
[sc_fs_multi_faq headline-0=”h2″ question-0=”Is Add That Source Kodi Addon legal?” answer-0=”Yes. It is not illegal to install and use this Kodi add-on. However, what you access after you have installed this add-on may be illegal.” image-0=”” headline-1=”h2″ question-1=”Should I use a VPN with Add That Source Kodi addon?” answer-1=”A VPN such as IPVanish is always encouraged when installing any 3rd party Kodi addons and repositories. This will ensure your privacy and anonymity when streaming.” image-1=”” headline-2=”h2″ question-2=”Can Add That Source Kodi addon be installed on firestick?” answer-2=”Yes. Follow the step-by-step instructions above. This tutorial was done using an Amazon Firestick 4K.” image-2=”” headline-3=”h2″ question-3=”What’s the difference between a Kodi addon and a Kodi repository?” answer-3=”A repository is a file that stores numerous Kodi addons and more for installation. Usually you are required to install a repository to install a Kodi addon or build.” image-3=”” headline-4=”h2″ question-4=”What’s the difference between a Kodi addon and a Kodi build?” answer-4=”You can think of a Kodi build as a bundle of the best add-ons, repositories, and a customized skin that you can install with one click.” image-4=”” ” count=”5″ html=”true” css_class=””]
This page includes affiliate links where TROYPOINT may receive a commission at no extra cost to you. Many times, visitors will receive a discount due to the special arrangements made for our fans. Learn more on my Affiliate Disclaimer page.


